
One local specialist per area. No competing quotes, no middlemen – just a direct connection with the plasterer who covers your patch.
Finding someone to do plastering shouldn’t mean your phone blowing up with calls from people fighting for the same job. That’s the issue with Bark and Checkatrade – and half the time the caller isn’t even suited to the work.
We keep things simple.
We keep it simple across Liverpool. One plasterer per area, no lead sellers, no call centres – just a direct line to the person who’ll be doing the job.
Plastering isn’t one single type of work. A ceiling repair, a skim and an artex job all need different approaches – so we’ve separated everything into clear options.
If you’re ready to book, call or message us and we’ll put you through to the plasterer handling your area. Not quite there yet? Have a look at what we offer below to see if it matches what you need.
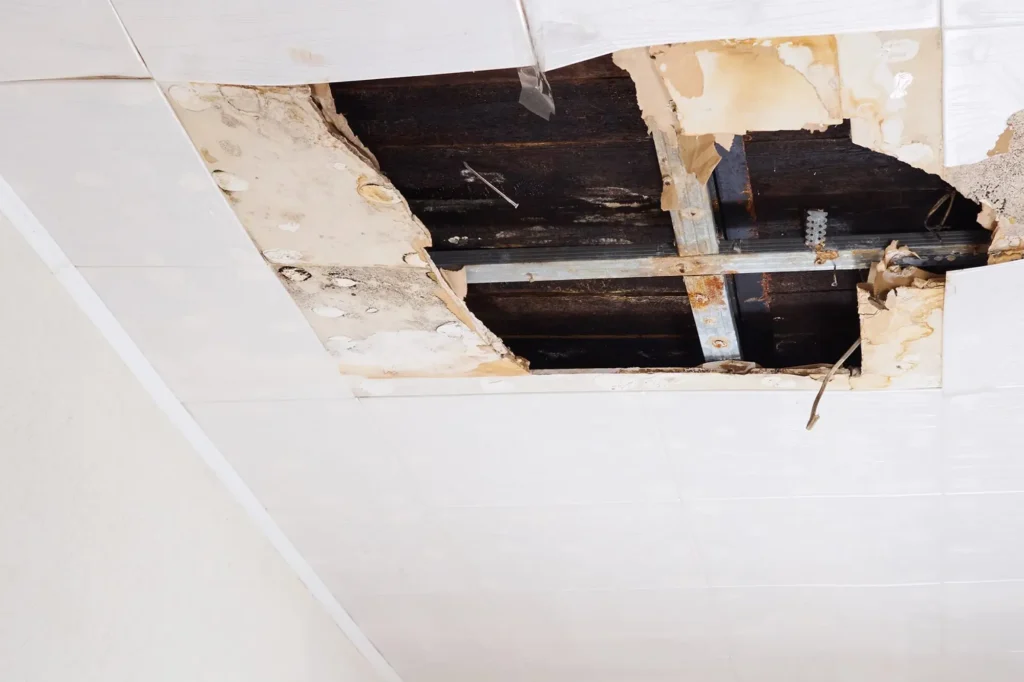
Major plaster damage requiring urgent attention? Ceiling repairs after water damage, fallen plaster creating safety hazards, structural cracks needing immediate assessment? Emergency plastering addresses urgent situations that can’t wait. Burst pipe ceiling damage, storm-related plastering problems, sudden plaster failure – all need rapid professional response. Emergency patch repairs, ceiling collapse prevention, urgent water damage work. Direct contact with emergency plasterer handling crisis plastering throughout your area.
Urgent plastering work that addresses emergencies properly. Emergency plasterer provides same-day response for ceiling collapse, water damage repairs, fallen plaster removal. Crisis situations handled efficiently – burst pipe ceiling damage, storm plastering problems, urgent patch repairs. Direct access to emergency plastering services. No competing tradespeople when you need immediate response. Experienced handling of urgent ceiling repairs, water damage assessment, emergency patch work throughout your area.
Artex ceilings dating your property? Professional artex removal and ceiling flattening transforms dated textured ceilings. Whether artex coating over or complete textured ceiling removal, achieving smooth finish requires preparation and skimming expertise. Artex covering, artex flattening, ceiling replastering – all approaches depending on condition. Heavy prep work essential for professional artex skimming. Expert textured ceiling work, artex removal, ceiling smoothing throughout your area.
Textured ceiling transformation demands careful assessment, not one-size-fits-all solutions. Experienced specialists evaluate condition before recommending appropriate artex removal or coating approach. Meticulous preparation creates foundation for smooth lasting finish, professional skimming eliminates dated texture, modern result achieved efficiently. Clear communication throughout process, respectful treatment of occupied properties. Professional artex specialists throughout your area.
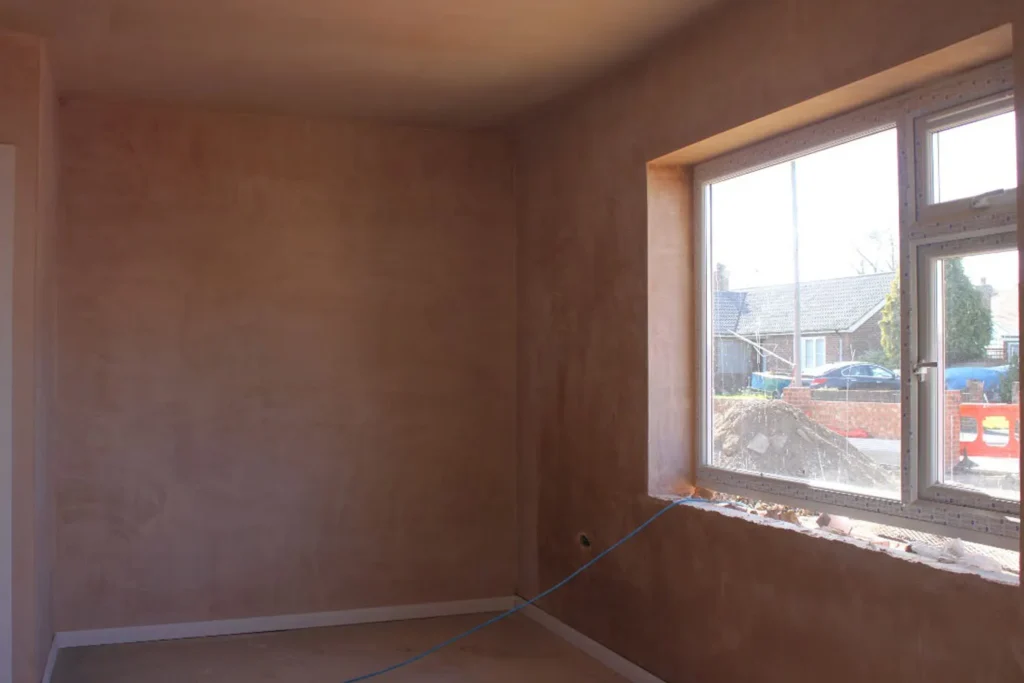
Want decoration-ready smooth walls and ceilings? Plastering, skimming and replastering services create perfect surfaces for paint or wallpaper. Skim coating rough walls, ceiling plastering, replastering old areas – all essential preparation. Professional room plastering, wall skim plaster, ceiling plaster coating. Expert plastering and skimming transforms surfaces achieving smooth decoration-ready finish. Skilled plastering, skimming and replastering services throughout your area.
Quality plastering creates foundation for beautiful decorating-poor work ruins expensive wallpaper. Expert surface assessment ensures proper preparation, identifies potential issues, prevents future problems developing. Professional skim application achieves decoration-ready smoothness, careful execution saves decorator time, lasting finish justifies investment. Clear communication about timescales and drying requirements, respectful property treatment. Trusted plastering services throughout your area.
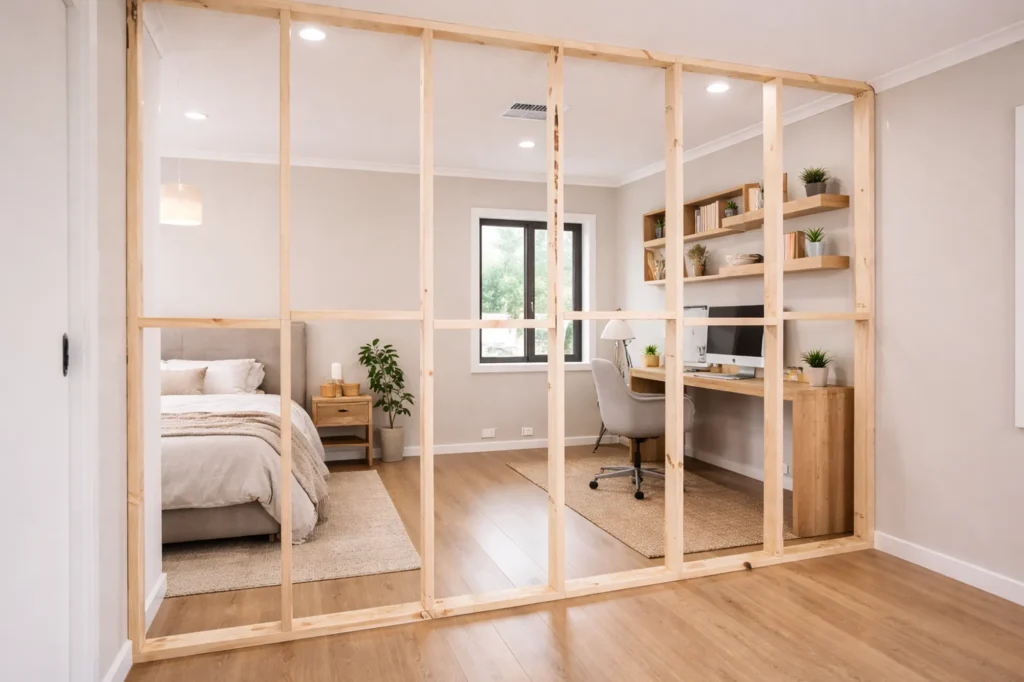
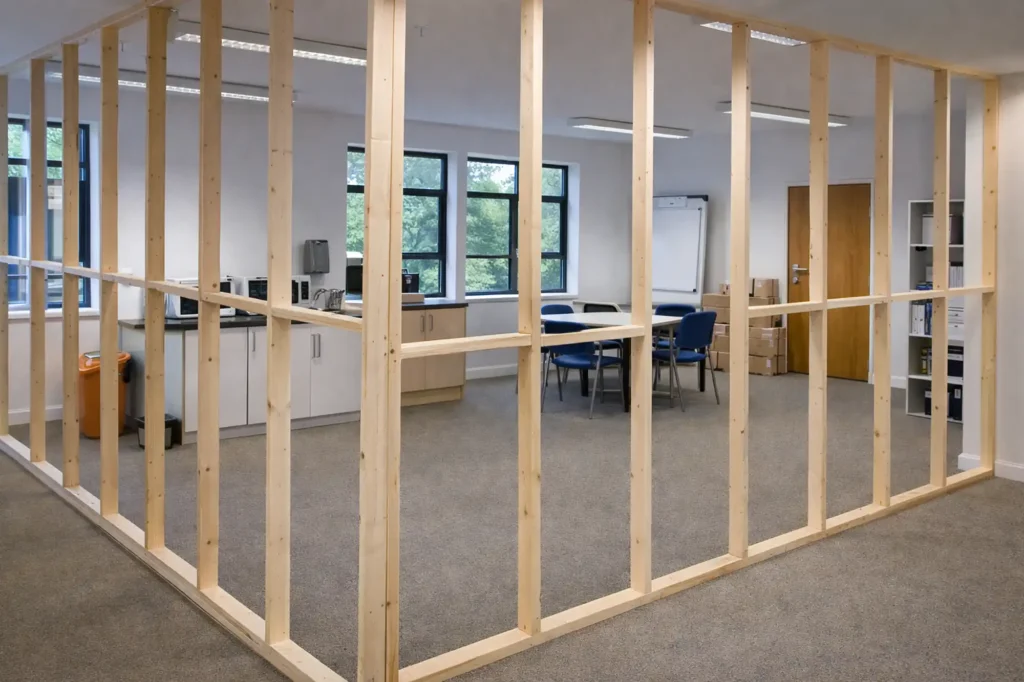
Need room creation or space division solutions? Stud wall construction and plasterboarding provides flexible options for layout modifications. Partition walls, plasterboard installation, dry lining services. Stud partitions, boarding and skimming, plasterboard walls. Metal or timber stud wall building, professional plasterboard fitting. Expert stud wall and plasterboarding services for creating rooms and dividing spaces.
Room creation demands proper planning-poorly built stud walls cause ongoing problems. Professional assessment determines appropriate construction method, ensures structural soundness, prevents future issues developing. Expert installation creates functional spaces efficiently, careful measurement ensures square walls, quality workmanship provides lasting room division. Clear explanation of options and realistic costs, respectful treatment of occupied properties. Trusted stud wall construction throughout your area.
Commercial fit-out or refurbishment needing plastering? Contract plastering services cover office projects, retail work, hospitality refurbishments. Commercial plasterers handle shop plastering, restaurant fit-outs, office plastering work. Industrial plastering, commercial plasterboarding, retail fit-out plastering. Large-scale projects, commercial property work, office refurbishment plastering. Professional commercial plastering for retail, office, hospitality projects throughout your area.
Commercial refurbishments require minimal disruption to trading or operations. Experienced commercial plasterers schedule sensitively, coordinate efficiently with contractors, maintain professional finish quality throughout. Expert project management prevents costly delays, flexible working hours accommodate business needs, reliable completion commitment maintained. Clear communication with site managers, thorough protection protocols. Trusted contract plastering throughout your area.
Why choose us? That part’s up to you. Below is the straight, no-nonsense detail on Liverpool homes and plastering work.
We’ve been plastering Liverpool for years, getting around from Albert Dock to Anfield Stadium and over toward Liverpool Cathedral. That gives us proper local knowledge – the houses, the plaster, and the problems we fix day in, day out.
Our plastering services span the full spectrum – quick fixes for leaks, complete re-skims on walls and ceilings, artex flattening, stud wall builds, and commercial projects. Pick the service that suits your job above, scan the details, and see if it fits.
The typical properties in Liverpool are Victorian terraced and Edwardian semi-detached villas, featuring ceilings ranging from 2.7m to 3.2m (8.9ft – 10.5ft). That range keeps us busy – we’ve got real experience with how the plaster behaves and what works best for every project.
Frequent challenges are blown plaster near chimneys or in damp-prone spots, uneven or cracked walls from years of wear, and tired textured ceilings that need a modern update. Newer properties tend to need patching for damage and clean skims to brighten rooms.
Fill out the form or call now to speak directly to the plasterer covering your area. No call centres, no delays – just clear answers and fast action.
Your details are safe – we only use them to respond to your enquiry
Everyone searching for plasterers wants the same information – what things cost, how long work takes, what causes problems, when to call someone. We’ve covered the 100 most-asked plastering questions below. From costs and timelines to materials and maintenance, all answered clearly.
Look for NVQ Level 2/3 in Plastering, City & Guilds qualifications, or extensive proven experience - formal qualifications demonstrate competency and knowledge. NVQ Level 2 covers basic plastering skills, Level 3 advanced techniques.
City & Guilds diplomas widely recognized industry qualifications.
Many excellent plasterers learned through apprenticeships without formal qualifications - extensive experience and quality portfolio equally valid. Insurance essential - public liability minimum £2-5 million protecting against damage claims.
Professional memberships like Federation of Plastering and Drywall Contractors indicate commitment to standards. Gas Safe registration necessary if working near gas installations. Scaffolding tickets required for high work.
Trade references and completed project portfolios demonstrate capability. Qualifications helpful but proven track record and quality work most important indicators.
Warning signs include unusually cheap quotes, cash-only demands, no insurance, pressure tactics, vague estimates, reluctance providing references signaling potential problems. Quotes significantly below market rate often indicate shortcuts, inferior materials, or hidden costs emerging later.
Cash-only insistence suggests tax avoidance and leaves you unprotected if problems arise. No insurance means you're liable for accidents or damage. Pressure to decide immediately prevents proper comparison and consideration.
Vague estimates without detailed breakdowns hide scope for disputes. Refusing references or portfolio viewing suggests poor previous work. No written quotes or contracts create dispute risks.
Arriving in unmarked vehicles, no business details, untraceable contact information all red flags.
Professional plasterers provide detailed written quotes, insurance certificates, references, clear contact information, reasonable timeframes for decisions.
No, cheapest quote often indicates compromises - quality materials, rushed work, hidden costs, or inexperience creating problems outweighing initial savings. Extremely low quotes suggest cutting corners somewhere - inferior materials, inadequate preparation, rushed application, or planning to add charges later.
Mid-range quotes from experienced plasterers typically offer best value - balancing fair pricing with quality work and proper materials. Very cheap work often needs remedial repairs costing more than hiring quality plasterer initially.
Consider total value - experience, materials, timeframe, guarantees, references, not just price. Cheap plasterers sometimes disappear when problems arise. Quality work costs more upfront but lasts longer, looks better, avoids future issues.
Get 3-4 quotes comparing details not just price. Choose based on overall package - reputation, experience, materials, approach, price combined.
Ask about experience, qualifications, insurance, materials, timeline, guarantees, references - thorough questioning reveals professionalism and suitability for your project. How long plastering professionally?
What relevant qualifications held? What insurance coverage maintained?
What materials planned - specific brands and types ensuring quality products not cheap alternatives? How long will work take including drying time? What guarantees or warranties offered on workmanship?
Can you provide recent customer references and portfolio? What's included in quote - materials, preparation, cleanup? How do you handle unexpected issues or additional work? What payment terms preferred? When could you start?
These questions help assess competence, approach, reliability. Professional plasterers answer confidently providing detailed information. Evasive or vague responses suggest potential problems.
Small job economics rarely work for busy professionals. Journey might be 40 minutes each way plus parking challenges. Setup requires dust sheets, tools, mixing equipment - same whether fixing crack or plastering house.
Two hours round-trip travel, one hour setup and cleanup, one hour actual work = half working day for minimal return. Meanwhile larger jobs waiting that could fill entire day profitably.
Minimum £150-200 charge seems expensive for small repair but barely covers overheads and lost opportunity.
Specialist plasterers focusing on period properties or high-end work particularly unlikely accepting small patch repairs. Better options: combine several small jobs making visit worthwhile, find handyman services, or wait until planning larger plastering work.
Plasterers work on internal walls and ceilings creating smooth decorated surfaces.
Renderers specialize in external wall coatings protecting building fabric from weather. Many tradespeople do both but techniques and materials differ significantly.
Internal plastering uses gypsum-based products or lime plaster creating smooth finishes ready for paint or wallpaper.
External rendering uses sand and cement or specialized renders designed withstanding weather exposure, UV, frost, rain. Rendering requires understanding drainage, weatherproofing, substrate movement.
Plastering focuses on achieving perfectly smooth flat surfaces for decoration. Some plasterers won't do rendering - different skillset and equipment needed.
Specialist renderers understand external substrate preparation, mesh reinforcement, weatherproof detailing. Ask which services offered - not all plasterers render, not all renderers plaster internally.
Choose specialist for your specific work type ensuring appropriate expertise.
Yes, always insist on detailed written quotes before work commences - protecting both parties and preventing disputes about scope and costs. Written quotes should specify work scope, materials used, timeline, total cost, payment terms, guarantees.
Verbal quotes create misunderstanding risks - memories differ about what was agreed.
Detailed breakdowns show materials, labor, preparation, cleanup preventing arguments about inclusions. Written quotes allow proper comparison between different plasterers - comparing like with like.
Professional tradespeople happily provide written quotes demonstrating transparency and professionalism. Refusing written quotes red flag suggesting potential problems. Keep quotes for reference during work and afterward if issues arise.
Written agreements protect you if work quality poor or incomplete. Never accept ""I'll tell you price when I see it"" - proper assessment means accurate written quote possible.
Reputable plasterers understand written quotes standard practice protecting everyone involved.
Reviews provide useful indicators but should combine with other checks - portfolio viewing, speaking with past clients directly, assessing professionalism during quotation. Positive reviews from multiple sources suggest consistent quality and reliability.
Look for detailed reviews describing specific work rather than generic praise.
Be cautious of perfect 5-star ratings with brief generic comments - potentially fake or incentivized reviews. Negative reviews inevitable for busy tradespeople - assess how they responded and resolved issues.
Check reviews across platforms - Google, Checkatrade, Trustpilot, social media. Recent reviews more relevant than old ones - quality and service can change over time.
Balance reviews with other factors - insurance, qualifications, quote quality, communication. Some excellent plasterers have limited online presence relying on word-of-mouth. Conversely some poor operators manipulate reviews.
Use reviews as one data point, not sole decision factor. Direct references from recent customers often more reliable than anonymous online reviews.
Minimum public liability insurance £2-5 million essential covering accidental damage to property or injury to people during work. Public liability protects you if plasterer damages your property, causes structural issues, or someone injured on site.
Employers' liability insurance mandatory if plasterer has employees - protects workers injured during job. Professional indemnity insurance covers poor workmanship claims though less common for plasterers than other trades.
Always request proof of insurance before work starts - reputable plasterers provide certificates without hesitation. Check insurance current and covers work type planned.
Uninsured plasterers put you at risk - you're liable for accidents, injuries, damage if they lack coverage. Insurance costs reflect in quotes but essential protection.
Trading without adequate insurance suggests unprofessional approach risking your property and finances. Never proceed with uninsured tradespeople regardless of price attractiveness. Proper insurance distinguishes professionals from cowboys.
Yes, absolutely check references - speaking with previous customers reveals work quality, reliability, professionalism that quotes and websites can't show. Ask for 2-3 recent references from similar projects to yours.
Contact references asking specific questions - quality of finish, timeline adherence, communication, cleanliness, problem handling, would they use again.
Photos show finished appearance but don't reveal process experience - references tell you about working with the plasterer. Be suspicious if plasterer can't or won't provide references - established professionals have satisfied customers happy to recommend.
Ask to see completed projects in person if possible - photos can mislead. Recent references more relevant than old ones - approaches and quality can change.
References from jobs like yours most useful - Victorian house reference irrelevant for new build. Professional plasterers expect reference checks and facilitate contact. Reluctance providing references major red flag suggesting problems.
Time invested checking references prevents expensive mistakes. Good references don't guarantee perfection but significantly reduce risk of poor experience.
You connect straight with the plasterer for your area – they’re the one who knows your neighbourhood and will manage your enquiry personally.
You connect straight with the plasterer for your area – they’re the one who knows your neighbourhood and will manage your enquiry personally.
You connect straight with the plasterer for your area – they’re the one who knows your neighbourhood and will manage your enquiry personally.
You connect straight with the plasterer for your area – they’re the one who knows your neighbourhood and will manage your enquiry personally.
You connect straight with the plasterer for your area – they’re the one who knows your neighbourhood and will manage your enquiry personally.
You connect straight with the plasterer for your area – they’re the one who knows your neighbourhood and will manage your enquiry personally.
You connect straight with the plasterer for your area – they’re the one who knows your neighbourhood and will manage your enquiry personally.
You connect straight with the plasterer for your area – they’re the one who knows your neighbourhood and will manage your enquiry personally.
You connect straight with the plasterer for your area – they’re the one who knows your neighbourhood and will manage your enquiry personally.
You connect straight with the plasterer for your area – they’re the one who knows your neighbourhood and will manage your enquiry personally.
Plastering typically costs £15-35 per square metre depending on work type and complexity. Re-skimming existing sound plaster costs £15-25/sqm - straightforward surface refresh.
Complete re-plastering with base coat and skim costs £25-35/sqm due to additional materials and labor.
Victorian and period properties often cost more - £30-40/sqm - due to high ceilings, lime plaster requirements, or intricate cornicing work. Emergency work commands premium rates.
Small jobs under 10sqm sometimes charged higher per-sqm rates due to minimum callout costs. Regional variations exist - London and Southeast typically 20-30% higher than North.
Quotes vary because plasterers assess jobs differently - some check thoroughly, others quote quickly without detailed inspection. Thorough assessment identifies hidden issues like blown plaster, damp damage, structural problems requiring additional work.
Quick quotes might miss these, leading to price increases once work starts. Experience level affects pricing - established professionals charge more than newcomers building portfolios.
Material quality varies - premium plasters cost more but perform better than budget alternatives. Regional differences, overhead costs, insurance coverage, and workload all influence pricing.
Two identical-looking jobs might need vastly different approaches once old plaster removed.
Usually yes - most plasterers quote inclusive of materials as standard practice. This covers plaster, sand, cement, PVA, scrim tape, beading - everything needed for job completion.
Always confirm during quoting though - some plasterers quote labor-only expecting you to supply materials.
Inclusive quotes prove simpler - plasterer sources appropriate materials, quantities calculated correctly, no compatibility issues arise. Labor-only quotes might seem cheaper initially but require you purchasing correct products, calculating amounts, arranging delivery, accepting wastage responsibility.
Specialist materials like lime plaster sometimes quoted separately due to higher costs and specific requirements. Written quotes should clearly state whether materials included.
Emergency work costs 50-100% premium over standard rates due to immediate availability and out-of-hours response. Standard plastering costs £15-35/sqm. Emergency callouts range £25-60/sqm depending on urgency and timing.
Evening, weekend, bank holiday work commands highest premiums.
Minimum callout charges apply - typically £150-300 regardless of job size covering immediate attendance. Burst pipe ceiling repairs, storm damage, urgent safety issues justify premium pricing.
Emergency plasterers drop other work, travel immediately, work unsociable hours. Insurance often covers emergency plastering costs.
Geographic location affects emergency rates - urban areas charge more than rural regions due to higher operating costs.
Victorian properties cost more due to high ceilings, lime plaster requirements, and architectural complexity. Ceiling heights of 3-3.5m need scaffolding or towers increasing labor and equipment costs.
Solid walls require breathable lime plaster costing £35-50/sqm versus modern gypsum's £25-35/sqm.
Original features like cornicing, ceiling roses, picture rails need careful preservation adding time and skill requirements. Lath and plaster construction common in Victorian buildings requires different techniques than modern plasterboard.
Walls often have multiple historic paint layers needing extensive preparation. Damp issues prevalent in solid wall construction require treatment before plastering.
Heritage materials and traditional methods take longer but essential for building integrity.
Multiple factors influence final costs - surface condition, ceiling height, access, property age, and finish requirements all impact pricing. Poor substrate condition requiring extensive preparation or base coat renewal increases costs significantly.
High ceilings need scaffolding adding equipment expenses.
Difficult access - narrow stairs, limited parking, upper floors without lifts - adds time and effort. Period properties often need lime plaster and careful handling costing more than modern buildings.
Smooth versus textured finishes affect labor time. Room size matters - small rooms cost more per square metre due to minimum charges. Material quality choices impact costs.
Geographic location, current demand, and plasterer experience level all influence final quotes.
Some plasterers provide same-day quotes for straightforward jobs, but thorough assessments usually take 24-48 hours. Quick quotes work for simple re-skimming of accessible rooms where condition easily assessed.
Complex jobs needing detailed inspection, measurements, problem identification require proper site visits and calculation time.
Same-day quotes often based on limited information risking underestimation and later price increases. Reputable plasterers prefer thorough assessment preventing surprises - checking behind furniture, tapping walls testing soundness, identifying hidden issues affecting costs.
Rushed quotes sometimes miss crucial factors like damp, blown plaster, structural problems. Better waiting 24-48 hours for accurate quote than accepting quick estimate requiring revision once work starts.
Both methods used - per room pricing suits residential work, per square metre better for larger commercial jobs or complex calculations. Room pricing simplifies understanding - ""£400 - £600 for small to medium sized bedroom plastering"" clearer than square metre breakdowns.
However, room sizes vary enormously making comparisons difficult.
Per square metre rates (£15-35/sqm) allow accurate comparisons across different plasterers and job sizes. Small rooms often charged per room as minimum fees apply - calculating tiny areas by square metre seems expensive due to setup and travel costs.
Large rooms usually quoted per square metre as room rates become unwieldy. Mixed approaches common - rooms quoted individually but calculated from square metre rates internally. Always ask breakdown understanding what's included.
Call-out fees vary by plasterer and job type - some charge separate fees, others build costs into overall quote. Emergency work usually includes call-out charges £75-150 covering immediate response.
Standard work quotes often incorporate travel and assessment costs rather than itemizing separately.
Small jobs sometimes incur minimum charges effectively functioning as call-out fees - £150-250 minimum regardless of actual work scope. Distance affects policies - local jobs rarely charged extra, distant locations might incur travel fees.
Reputable plasterers clarify charging structure upfront. Free quotes common for substantial work as assessment costs absorbed into main job. Always ask about call-out or minimum charges during initial contact preventing surprise fees.
Payment terms vary but typical structure involves deposit upfront, balance on completion - usually 30-50% deposit, remainder after finishing. Small jobs under £500 often paid in full on completion without deposit required.
Larger projects might split payments - deposit before start, interim payment mid-job, final balance after completion.
Materials-heavy jobs sometimes require higher deposits covering material purchases upfront. Cash payments sometimes offer discounts. Bank transfer increasingly common.
Credit card acceptance varies - smaller operators often cash/transfer only, established companies might accept cards despite fees. Never pay full amount upfront - legitimate plasterers don't require complete pre-payment.
Final payment only after inspecting finished work ensuring satisfaction before releasing funds.
You connect straight with the plasterer for your area – they’re the one who knows your neighbourhood and will manage your enquiry personally.
You connect straight with the plasterer for your area – they’re the one who knows your neighbourhood and will manage your enquiry personally.
You connect straight with the plasterer for your area – they’re the one who knows your neighbourhood and will manage your enquiry personally.
You connect straight with the plasterer for your area – they’re the one who knows your neighbourhood and will manage your enquiry personally.
You connect straight with the plasterer for your area – they’re the one who knows your neighbourhood and will manage your enquiry personally.
You connect straight with the plasterer for your area – they’re the one who knows your neighbourhood and will manage your enquiry personally.
You connect straight with the plasterer for your area – they’re the one who knows your neighbourhood and will manage your enquiry personally.
You connect straight with the plasterer for your area – they’re the one who knows your neighbourhood and will manage your enquiry personally.
You connect straight with the plasterer for your area – they’re the one who knows your neighbourhood and will manage your enquiry personally.
You connect straight with the plasterer for your area – they’re the one who knows your neighbourhood and will manage your enquiry personally.
Emergency plastering covers immediate safety hazards and major damage requiring urgent attention preventing further deterioration. Ceiling collapse or imminent collapse, burst pipe ceiling damage with water still present, storm damage exposing building interior, major cracks indicating structural movement, fallen plaster creating safety hazards all qualify as emergencies.
Minor cracks, cosmetic damage, gradual deterioration don't constitute emergencies - these can wait for scheduled work. True emergencies involve active water ingress, structural instability, exposed electrical wiring, or situations where delay causes escalating damage.
Insurance companies recognize genuine emergencies requiring immediate attendance. Non-urgent work disguised as emergency wastes resources and attracts unnecessary premium charges.
Emergency availability varies by plasterer - some offer genuine 24/7 response, others provide extended hours rather than round-the-clock service. True 24/7 services maintain constant availability including nights, weekends, bank holidays responding to genuine emergencies.
Extended hours services might cover evenings and weekends but not middle-of-night callouts.
Always verify actual availability during initial contact - ""emergency service"" doesn't automatically mean 24/7 response. Genuine emergencies like ceiling collapse or major water damage need immediate attention regardless of timing.
Solo plasterers can't realistically offer constant availability. Established companies with multiple operatives more likely providing true 24/7 coverage. Premium rates apply for out-of-hours work reflecting availability sacrifice.
Response times vary by location, time, and emergency severity - typically 1-4 hours for genuine emergencies within normal coverage areas. Urban locations usually receive faster response than rural properties due to plasterer concentration.
Daytime emergencies generally get quicker response than middle-of-night callouts.
True emergencies like ceiling collapse receive priority over less urgent situations. Distance significantly affects arrival time - local emergencies within 30 minutes, distant locations might take 2-3 hours.
Weather conditions impact travel times especially during storms when emergency work peaks. Multiple simultaneous emergencies can delay response. Always communicate urgency level clearly enabling appropriate prioritization.
Temporary securing measures might precede full repairs if immediate attendance impossible.
Ceiling collapse typically results from water damage, structural movement, failed fixings, or age-related deterioration weakening supporting systems. Water damage from burst pipes, roof leaks, or bathroom overflow saturates plaster and lath making them heavy and compromising fixings.
Structural movement from settlement, subsidence, or inadequate support stresses ceiling materials causing failure.
Old lath and plaster ceilings eventually fail as fixing nails rust and timber deteriorates over decades. Impact damage from above, excessive ceiling loads, vibration from construction work can trigger collapse.
Ceiling sagging, cracking, or visible deflection indicates imminent failure requiring urgent assessment. Original ceiling construction quality affects longevity - poorly fixed ceilings fail sooner.
Multiple factors often combine causing final collapse.
Insurance typically covers emergency plastering resulting from insured events like burst pipes, storm damage, or sudden accidental damage. Building insurance should cover structural emergency repairs.
Contents insurance might cover belongings damaged by ceiling collapse.
Policy excess applies - you pay first £100-500 depending on policy terms. Gradual deterioration, maintenance neglect, pre-existing issues typically excluded from coverage.
Insurance requires immediate action preventing further damage - emergency repairs preventing escalation usually covered. Document everything - photos, emergency plasterer invoices, damage evidence for claims.
Notify insurers promptly - some policies require notification within 24-48 hours. Emergency make-safe work generally covered, full restoration might need approval. Read policy carefully understanding coverage limits and exclusions.
No, complete drying essential before plastering - typically 2-3 weeks depending on saturation severity and drying conditions. Plastering wet substrates traps moisture causing new plaster failure, ongoing damp issues, potential mold growth.
Emergency work focuses on securing damaged areas, removing saturated materials, establishing drying process.
Dehumidifiers, heaters, ventilation accelerate drying but adequate time still required. Moisture meters measure dryness - readings must reach acceptable levels before plastering commences.
Rushing plastering over damp substrates creates expensive failures requiring removal and proper re-plastering once dried. Insurance often covers temporary accommodation during extended drying periods.
Patience prevents problems - proper drying ensures successful long-term repairs.
Temporary emergency repairs focus on making safe, preventing further damage, and protecting property until proper repairs possible. Securing loose or sagging ceilings with temporary supports preventing complete collapse.
Covering exposed areas with plastic sheeting protecting from weather and preventing water ingress.
Removing dangerous loose plaster sections eliminating falling hazards. Installing temporary bracing supporting damaged structures. Applying quick-set patching compounds sealing holes or cracks temporarily.
Protecting electrics and services from exposed damage. Boarding over large holes securing property. Temporary measures aren't permanent solutions - proper repairs follow once conditions allow. Insurance often covers temporary securing costs.
Emergency plasterers assess full damage extent recommending permanent repair approach once immediate risks addressed.
Yes, genuine emergency plasterers work weekends, bank holidays, and outside normal hours responding to urgent situations. True emergencies like ceiling collapse, major water damage, structural safety issues don't wait for Monday morning.
Emergency services maintain weekend availability because problems occur anytime.
Weekend and bank holiday work attracts premium rates - typically 30-50% higher than weekday pricing reflecting unsociable hours working. Not all plasterers offering ""emergency service"" actually work weekends - verify availability during initial contact.
Established emergency companies with multiple operatives better positioned covering weekends than solo traders. Genuine emergencies justify weekend callouts and premium costs.
Non-urgent work should schedule for weekdays avoiding unnecessary premium charges.
Emergency callouts typically include immediate attendance, damage assessment, temporary securing, and quote for permanent repairs. Plasterer attends promptly evaluating damage extent and safety risks.
Makes safe through temporary measures - propping unstable areas, removing hazards, covering exposed sections.
Assessment identifies permanent repair requirements providing detailed quote for comprehensive restoration. Call-out fee covers attendance, assessment, basic securing - usually £75-150.
Extensive temporary work might incur additional charges beyond basic callout. Permanent repairs quoted separately based on damage assessment. Some plasterers include photographs documenting damage for insurance claims.
Clear communication about what's covered in callout fee versus additional charges prevents disputes. Written confirmation of callout inclusions and costs recommended.
Securing damaged ceilings involves temporary propping, removing loose sections, and preventing further collapse until permanent repairs possible. Install adjustable props or acrow jacks supporting sagging areas preventing complete failure.
Remove dangerous loose plaster sections eliminating falling hazards while preserving intact areas.
Sheet or board over damaged sections containing debris and preventing further material falling. Clear area below removing furniture and belongings preventing damage from potential falls.
Identify and address underlying causes - water ingress, structural movement - preventing continuing deterioration. Mark secured areas warning occupants of temporary measures. Document damage photographically for insurance and repair planning.
Temporary securing provides safety not permanent solution - comprehensive repairs follow once conditions allow and materials dry.
You connect straight with the plasterer for your area – they’re the one who knows your neighbourhood and will manage your enquiry personally.
You connect straight with the plasterer for your area – they’re the one who knows your neighbourhood and will manage your enquiry personally.
You connect straight with the plasterer for your area – they’re the one who knows your neighbourhood and will manage your enquiry personally.
You connect straight with the plasterer for your area – they’re the one who knows your neighbourhood and will manage your enquiry personally.
You connect straight with the plasterer for your area – they’re the one who knows your neighbourhood and will manage your enquiry personally.
You connect straight with the plasterer for your area – they’re the one who knows your neighbourhood and will manage your enquiry personally.
You connect straight with the plasterer for your area – they’re the one who knows your neighbourhood and will manage your enquiry personally.
You connect straight with the plasterer for your area – they’re the one who knows your neighbourhood and will manage your enquiry personally.
You connect straight with the plasterer for your area – they’re the one who knows your neighbourhood and will manage your enquiry personally.
You connect straight with the plasterer for your area – they’re the one who knows your neighbourhood and will manage your enquiry personally.
Yes, but Victorian properties need specialist approach - breathable lime plaster, careful handling of original features, understanding solid wall construction. Victorian buildings typically have solid walls requiring lime plaster allowing moisture movement.
Modern gypsum traps moisture causing damp and deterioration in solid wall properties.
Original features like cornicing, ceiling roses, picture rails need protecting during work - skilled careful handling essential. High ceilings common in Victorian buildings require scaffolding or tower access adding costs.
Lath and plaster construction differs from modern plasterboard requiring different techniques. Listed Victorian properties might need conservation officer approval for materials and methods.
Specialist Victorian plastering costs more but essential for building longevity and authenticity.
Yes, Georgian properties require lime plaster, careful historical detail preservation, and understanding of period construction methods. Georgian buildings predate modern materials - lime plaster essential for solid wall breathability and building fabric compatibility.
Original Georgian plasterwork often elaborate requiring specialist conservation skills preserving decorative elements.
Listed Georgian properties usually need conservation officer approval for materials and techniques ensuring appropriate restoration. Traditional three-coat lime work follows historic methods - scratch coat, float coat, finish coat.
Georgian ceiling heights even taller than Victorian requiring extensive access equipment. Specialist lime plasterers understand period construction, appropriate materials, traditional techniques.
Costs significantly higher than standard work but essential for Georgian building integrity and heritage compliance.
Yes, 1930s semis straightforward to plaster using standard modern materials and techniques. 1930s construction typically features cavity walls suitable for modern gypsum plaster.
Standard two-coat system works well - bonding or browning base coat, multi-finish skim.
Ceiling heights more manageable than Victorian properties - typically 2.4-2.7m - reducing access equipment needs. Original 1930s plasterwork often lath and plaster requiring careful assessment checking soundness before re-skimming.
Artex common in 1930s properties from later updates potentially containing asbestos requiring testing and careful removal. Standard modern plastering techniques apply.
Costs lower than period properties - no lime plaster needed, standard ceiling heights, straightforward cavity wall construction. Quick completion possible using modern materials and methods.
Modern new builds easiest to plaster - plasterboard substrates, standard ceiling heights, modern materials, straightforward construction. New build walls typically plasterboard over timber or metal stud requiring skim coating only.
Two thin skim coats over taped and filled plasterboard joints create decoration-ready surfaces.
Standard 2.4m ceiling heights work from ground level without scaffolding needs. Modern construction uses cavity walls suitable for standard gypsum plaster. No historical constraints, asbestos concerns, or lime plaster requirements.
Quick completion possible - skimming plasterboard faster than base coating brick or block. Lower costs than older properties due to straightforward approach.
New builds sometimes have quality issues - poorly fixed plasterboard, inadequate jointing, rushed construction requiring attention before skimming.
Yes, but listed buildings require conservation-grade materials, approved techniques, and often conservation officer consent before work commences. Listed building consent typically needed for internal plastering work ensuring appropriate materials and methods.
Lime plaster usually mandatory maintaining building breathability and historical authenticity.
Modern gypsum generally prohibited in listed buildings - inappropriate for historic fabric causing moisture problems. Conservation officers specify acceptable materials, techniques, finishes ensuring heritage compliance.
Specialist conservation plasterers understand listed building requirements, traditional methods, appropriate materials. Detailed specifications often required before approval granted.
Higher costs reflect specialist skills, traditional materials, heritage compliance requirements.
Unauthorized work on listed buildings illegal potentially resulting in enforcement action requiring removal and proper restoration at owner's expense.
Plastering techniques identical, but flats present access challenges, noise considerations, and building regulation requirements affecting approach. Apartment blocks often have restricted access - narrow stairwells, lift size limitations, parking restrictions complicating material delivery and equipment transport.
Noise regulations in flats stricter - evening and weekend work often prohibited affecting scheduling flexibility. Shared walls might need special consideration - party wall agreements sometimes required for major work.
Fire regulations stricter in blocks - materials might need specific fire ratings. Communal area protection necessary - covering hallways, lifts, lobbies preventing damage during transport.
Building management approval sometimes needed before work commences. Access times restricted to specific hours. Costs similar to houses for actual plastering but logistics can add expenses.
Yes, using moisture-resistant materials and proper preparation - cement render or moisture-resistant plaster before tanking and tiling. Standard gypsum plaster unsuitable for wet areas - moisture causes failure.
Bathroom plastering uses sand and cement render or specialized moisture-resistant boards providing stable base for tanking systems.
Wet rooms need comprehensive tanking - waterproof membrane systems preventing water penetration behind tiles. Proper preparation essential - adequate ventilation, appropriate substrate, correct materials preventing future moisture problems.
Tiles go over tanked surfaces not directly onto standard plaster. Extractor fans necessary reducing moisture levels. Costs higher than standard rooms due to specialist materials and tanking requirements.
Poor bathroom plastering causes tile adhesion failure, damp problems, mold growth requiring expensive remediation.
Basements need specialist damp-proofing approach before plastering - tanking systems, appropriate materials, ventilation addressing moisture risks. Below-ground spaces face hydrostatic pressure pushing groundwater through walls.
Comprehensive tanking essential - waterproof membrane systems preventing moisture penetration before any plastering.
Standard gypsum plaster fails in damp basement conditions - cement render or specialized damp-resistant systems necessary. Adequate ventilation crucial reducing condensation and moisture buildup.
Dehumidifiers often needed controlling humidity levels. Waterproofing must address both penetrating damp and rising damp. Building regulations specify basement waterproofing standards.
Higher costs reflect specialist tanking, appropriate materials, damp-proofing requirements. Plastering without proper damp-proofing causes failure, mold, health issues requiring expensive remediation.
Professional basement specialists understand complex moisture management requirements.
Yes, extensions and conversions straightforward using standard modern materials - plasterboard or blockwork substrates with conventional plastering techniques. New extensions typically use modern construction methods - cavity walls, plasterboard, standard materials suitable for regular plastering approaches.
Loft conversions usually plasterboard over insulation requiring skim coating only.
Building regulations compliance essential - fire resistance, thermal performance, sound insulation requirements affecting material specifications. Matching existing property sometimes challenging - blending new work into old, maintaining ceiling heights, ensuring seamless transitions.
Structural alterations might affect existing plaster requiring remedial work beyond extension itself. Quick completion possible using modern materials and methods.
Standard costs apply unless matching period features or addressing structural complications. Building control inspections ensure regulatory compliance before plastering commences.
Yes, solid walls need breathable lime plaster while cavity walls suit standard gypsum - fundamental difference affecting materials, costs, and approach. Solid wall buildings (typically pre-1919) require lime plaster allowing moisture movement through wall fabric.
Modern gypsum creates impermeable barrier trapping moisture in solid walls causing damp, decay, structural problems.
Cavity walls (post-1919 construction) work well with standard gypsum plaster - cavity provides drainage plane preventing moisture reaching internal surfaces. Lime plastering costs significantly more than gypsum - specialist materials, traditional techniques, extended drying times.
Solid wall properties need careful assessment identifying breathability requirements. Cavity walls straightforward using modern materials and methods.
Understanding wall construction type essential determining appropriate plastering approach preventing future moisture problems and building deterioration.
You connect straight with the plasterer for your area – they’re the one who knows your neighbourhood and will manage your enquiry personally.
You connect straight with the plasterer for your area – they’re the one who knows your neighbourhood and will manage your enquiry personally.
You connect straight with the plasterer for your area – they’re the one who knows your neighbourhood and will manage your enquiry personally.
You connect straight with the plasterer for your area – they’re the one who knows your neighbourhood and will manage your enquiry personally.
You connect straight with the plasterer for your area – they’re the one who knows your neighbourhood and will manage your enquiry personally.
You connect straight with the plasterer for your area – they’re the one who knows your neighbourhood and will manage your enquiry personally.
You connect straight with the plasterer for your area – they’re the one who knows your neighbourhood and will manage your enquiry personally.
You connect straight with the plasterer for your area – they’re the one who knows your neighbourhood and will manage your enquiry personally.
You connect straight with the plasterer for your area – they’re the one who knows your neighbourhood and will manage your enquiry personally.
You connect straight with the plasterer for your area – they’re the one who knows your neighbourhood and will manage your enquiry personally.
Standard room plastering takes 1-3 days depending on work type - re-skimming 1-2 days, complete re-plastering 2-3 days including drying time. Small bedroom re-skim completes in one day - preparation, two skim coats, initial drying.
Larger rooms or full re-plastering with base coat need 2-3 days - base coat application day one, drying overnight, skim coat day two.
Multiple rooms extend timeline - three bedrooms might take 4-6 days total working room by room. Drying time before decoration crucial - minimum 5 - 10 days for gypsum plaster, 2 - 3 weeks for lime plaster.
Complications like extensive repairs, damp treatment, or difficult access add time. Emergency securing completes same day. Timeline estimates assume standard conditions without unexpected issues discovered during work.
Preparation involves protecting furniture and floors, removing loose plaster, treating stains, filling cracks, applying PVA sealers creating proper surface for plastering. Rooms cleared or furniture covered with dust sheets protecting from plaster splashes.
Floors covered with heavy-duty plastic preventing damage.
Old loose plaster removed - tapping walls identifies hollow sections requiring removal before fresh plaster applied. Cracks filled, holes patched, damaged areas repaired creating sound base. Damp patches treated preventing future problems.
Dust and dirt cleaned ensuring good adhesion. PVA solution applied sealing porous surfaces preventing plaster drying too quickly. Beading installed at corners and edges creating clean lines.
Proper preparation prevents plaster failure - attempting to skim over poor substrate causes debonding and cracking.
Plastering creates significant mess - dust from preparation, plaster splashes during application, general disruption requiring thorough protection and cleanup. Preparation generates dust - removing old plaster, sanding, cleaning creates airborne particles settling throughout property.
Plaster mixing produces dust.
Application involves wet plaster splashes despite careful working - protecting floors and furniture essential. Water used for mixing and cleaning adds to mess.
Professional plasterers minimize disruption through dust sheets, plastic covering, careful working. Post-work cleanup removes major debris but fine dust persists requiring thorough cleaning. Rooms unusable during work and immediate aftermath.
Expect dusty conditions extending beyond work area. Good preparation and protection minimize but don't eliminate mess. Budget time for thorough post-plastering cleaning.
Yes, plastering possible while occupied but causes significant disruption - dust, noise, room unavailability, mess requiring household tolerance and adaptation. Rooms being plastered completely unusable during work and drying period.
Dust spreads despite protection requiring covering belongings throughout property.
Noise from mixing, application, cleanup disturbs normal activities especially with young children or home workers. Strong plaster smell permeates property for days.
Bathroom and kitchen plastering particularly disruptive affecting daily routines. Access through work areas necessary creating inconvenience. Some families prefer temporary accommodation during major plastering avoiding disruption.
Small jobs manageable while living in property. Whole house plastering significantly impacts daily life. Coordination with plasterers minimizes disruption.
Many homeowners combine plastering with holidays or stays elsewhere avoiding worst disruption.
Yes, winter plastering possible with adequate heating and ventilation - maintaining 10°C minimum temperature essential for proper drying and curing. Cold temperatures slow plaster setting and drying potentially causing problems.
Heating must maintain consistently above 10°C during application and drying period.
Frost damages wet plaster - below-freezing temperatures cause plaster failure requiring removal and re-application. Ventilation essential despite cold - moisture removal necessary preventing condensation and prolonged drying.
Dehumidifiers help in cold weather accelerating drying while maintaining temperature. Winter drying times extend - cold damp conditions take longer than warm dry periods. External rendering generally avoided in winter - frost risk too high.
Internal plastering manageable with proper heating. Higher heating costs during winter plastering. Professional plasterers assess conditions before commencing winter work ensuring success.
Rain during external plastering/rendering disastrous - wet plaster washes off, damaged work requires removal and re-application, weather monitoring essential. Fresh render extremely vulnerable to rain - water washes away plaster, ruins finish, compromises adhesion.
Work must stop immediately when rain starts - covering partially completed work with plastic sheeting provides limited protection. Severely rain-damaged render requires complete removal and re-application - no effective repair for washed plaster.
Weather forecasts checked carefully before commencing external work. Summer months preferred for external plastering minimizing rain risks.
Rain within 24-48 hours of application still problematic - fresh render needs protection until adequately cured. Professional plasterers won't start external work with rain forecast.
Insurance might not cover rain damage if work commenced despite poor forecast. Careful timing and weather monitoring essential for successful external plastering.
Professional plasterers remove major debris and clean equipment but detailed final cleaning usually customer responsibility. Plasterers clear large plaster chunks, mixing buckets, tools, obvious waste during and after work.
Floors swept removing major debris - fine dust and plaster residue remains requiring thorough cleaning. Dust sheets and protective coverings removed taking some dust with them.
Plaster splashes on skirting, windows, fixtures need cleaning - some plasterers address these, others leave for customer. Professional cleanup removes work materials but doesn't include deep cleaning entire property.
Fine plaster dust settles everywhere requiring comprehensive vacuuming and wiping. Some plasterers include thorough cleanup in quotes - clarify expectations during quotation.
Budget time for post-plastering deep cleaning or hire professional cleaners. Clarify cleanup scope before work commences preventing disputes.
Base coat requires 24-48 hours drying before skim application - rushing causes problems with adhesion and finish quality. Thick base coats (bonding/browning) need adequate drying time before skim coat applied.
Attempting to skim over wet base coat causes poor adhesion, cracking, finish problems requiring expensive remediation. Drying time depends on thickness, temperature, ventilation, humidity - cold damp conditions extend drying significantly.
Thin base coats might dry overnight in good conditions. Thick applications potentially need 48+ hours. Professional plasterers assess base coat readiness - surface should be firm, not wet or soft.
Between skim coats minimal wait - first skim coat partly dried before second application, typically 20-30 minutes. Lime plastering requires longer intervals - weeks between coats following traditional methods.
Rushing between coats compromises results.
No, heating should stay on maintaining consistent temperature - 10-20°C ideal for plastering, avoiding extreme heat or cold. Consistent moderate temperature aids proper plaster setting and drying.
Avoid turning heating up high trying to speed drying - rapid drying causes cracking, poor finish, adhesion problems. Cold temperatures slow setting making working difficult.
Very hot conditions accelerate drying preventing proper working time. Maintain steady comfortable temperature throughout plastering and initial drying. Heating off in winter problematic - cold affects plaster performance.
Heating excessively high equally problematic causing rapid drying issues. After initial set, gentle heating with good ventilation aids drying. Dehumidifiers more effective than high heat for drying.
Extreme temperature changes during drying cause cracking. Professional plasterers work best in moderate consistent conditions avoiding temperature extremes affecting plaster behavior.
Availability varies by plasterer - some offer flexible hours including evenings and weekends, others work standard business hours only. Solo plasterers might accommodate evening or weekend work fitting around other commitments.
Weekend and evening work typically costs premium - 20-30% higher than standard rates reflecting unsociable hours. Larger companies with multiple operatives better positioned offering flexible scheduling.
Emergency work available 24/7 from emergency services at premium rates. Standard non-urgent work usually scheduled business hours minimizing costs.
Noise considerations affect evening work - neighbors, building regulations, lease terms might restrict working hours. Apartment blocks often have specific time restrictions preventing evening or weekend work.
Discuss scheduling requirements during quotation - plasterers indicate availability and any premium charges. Planning ahead enables standard hours scheduling avoiding premium costs.
You connect straight with the plasterer for your area – they’re the one who knows your neighbourhood and will manage your enquiry personally.
You connect straight with the plasterer for your area – they’re the one who knows your neighbourhood and will manage your enquiry personally.
You connect straight with the plasterer for your area – they’re the one who knows your neighbourhood and will manage your enquiry personally.
You connect straight with the plasterer for your area – they’re the one who knows your neighbourhood and will manage your enquiry personally.
You connect straight with the plasterer for your area – they’re the one who knows your neighbourhood and will manage your enquiry personally.
You connect straight with the plasterer for your area – they’re the one who knows your neighbourhood and will manage your enquiry personally.
You connect straight with the plasterer for your area – they’re the one who knows your neighbourhood and will manage your enquiry personally.
You connect straight with the plasterer for your area – they’re the one who knows your neighbourhood and will manage your enquiry personally.
You connect straight with the plasterer for your area – they’re the one who knows your neighbourhood and will manage your enquiry personally.
You connect straight with the plasterer for your area – they’re the one who knows your neighbourhood and will manage your enquiry personally.
Wait around 1 - 3 weeks before painting newly plastered walls - adequate drying essential preventing paint problems and plaster issues. Gypsum plaster needs 5 - 10 days drying in good conditions. Lime plaster requires 2 - 3 weeks minimum.
Painting too soon traps moisture causing bubbling paint, plaster cracking, adhesion failure, mold growth requiring expensive remediation. Drying time extends in cold damp conditions - winter might need 4+ weeks.
Proper ventilation and gentle heating speed drying. First paint coat should be mist coat - watered-down emulsion sealing plaster. Full-strength paint over undried plaster causes problems.
Moisture meters verify adequate dryness before painting. Patience prevents failures - rushing creates expensive problems requiring replastering and repainting.
Mist coating means applying heavily diluted emulsion as first coat on fresh plaster - sealing porous surface preventing paint absorption and adhesion problems. Mix emulsion with water approximately 70% paint to 30% water creating thin watery consistency.
Mist coat soaks into plaster sealing surface creating stable base for subsequent full-strength coats. Fresh plaster extremely porous - full-strength paint gets absorbed unevenly, dries patchy, wastes paint, causes poor finish.
Mist coat prevents these problems ensuring even coverage and proper adhesion. Apply mist coat when plaster adequately dried - usually 1 - 3 weeks after plastering. Some use contract matt emulsion for mist coating - designed for new plaster.
Two full-strength top coats follow mist coat achieving desired finish. Skipping mist coat causes patchy coverage requiring multiple coats wasting time and money.
No, plaster must dry completely before wallpapering - minimum 1 - 4 weeks ensuring adequate moisture evaporation preventing paste failure and mold. Fresh plaster contains significant moisture incompatible with wallpaper paste.
Papering damp plaster causes paste failure, paper bubbling, mold growth, adhesion problems requiring stripping and re-papering. Gypsum plaster needs 1 - 2 weeks drying. Lime plaster requires 4 weeks minimum.
Cold damp conditions extend drying times significantly. Moisture meters verify adequate dryness before papering. Size walls before papering - sealing coat preventing excessive paste absorption.
Patience essential - rushing causes expensive failures. Some installers use lining paper first providing stable base and additional moisture barrier. Professional decorators refuse papering insufficiently dried plaster.
Adequate drying ensures successful long-lasting wallpaper installation.
New plaster cracks from rapid drying, temperature changes, structural movement, or poor application - hairline cracks often normal, wide cracks indicate problems. Hairline surface cracks common as plaster dries and shrinks slightly - cosmetic issue not structural concern.
Wide cracks, recurring cracks, or cracks showing movement indicate underlying problems requiring investigation and repair. Rapid drying from excessive heat causes cracking - maintaining moderate consistent temperature prevents this.
Temperature fluctuations during drying create stress causing cracks. Structural movement from settlement or inadequate support causes cracking. Poor mixing, incorrect water ratios, inadequate preparation contribute to cracking.
Skimming over unstable base causes cracks as base moves. Fine surface cracks fillable before decorating. Significant cracking might need investigation addressing root causes before repair.
Plastered walls need minimal maintenance - regular cleaning, prompt leak repairs, adequate ventilation, avoiding impact damage maintaining long-term condition. Dust and clean walls gently using soft cloth or vacuum with brush attachment.
Avoid harsh abrasives or excessive water causing surface damage. Address water leaks immediately preventing plaster damage - burst pipes, roof leaks, condensation require prompt attention.
Maintain adequate ventilation preventing condensation and mold - extractor fans in bathrooms and kitchens essential. Avoid hanging heavy items without proper fixings - impact damage chips and cracks plaster.
Minor damage repairable - small cracks fillable, chips patchable maintaining appearance. Repaint periodically refreshing appearance and providing protective layer. Monitor for cracks, staining, or deterioration indicating underlying problems.
Well-maintained plaster lasts decades requiring minimal intervention.
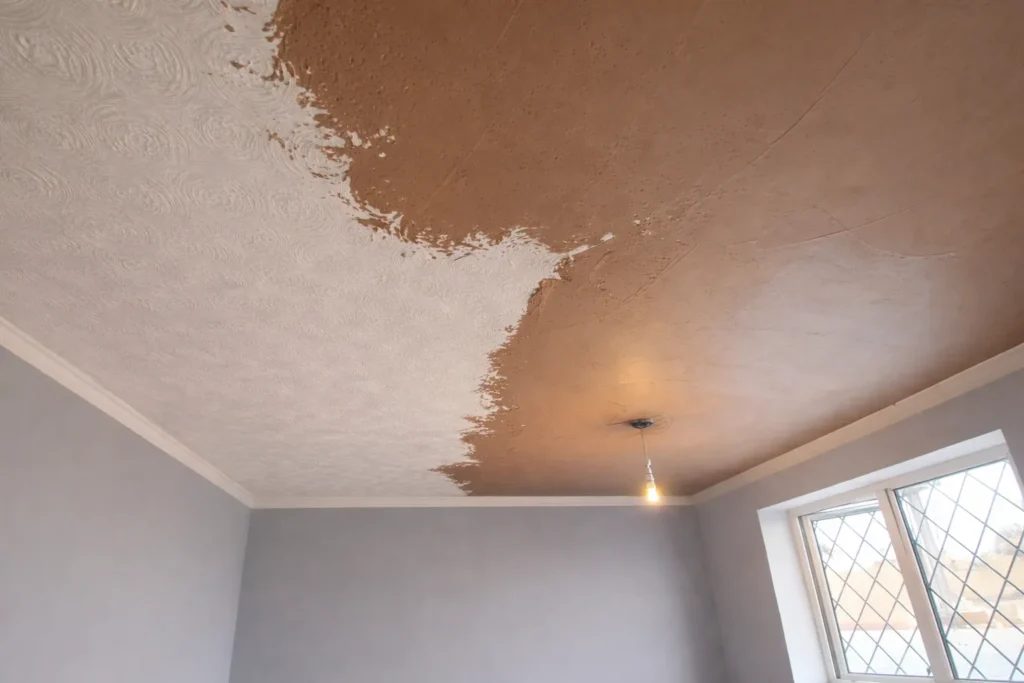
Blown plaster occurs when plaster loses adhesion to substrate creating hollow voids - caused by moisture, poor preparation, or age requiring removal and replacement. Tapping hollow-sounding areas identifies blown sections - sound plaster gives solid response.
Moisture most common cause - water penetration, rising damp, condensation weaken adhesive bond causing plaster separating from wall. Poor surface preparation prevents proper adhesion - dusty, contaminated, or sealed surfaces reject plaster.
Age and movement eventually cause adhesion failure. Small blown areas sometimes injectable with specialized adhesives. Larger areas require removal and re-plastering - attempting to repair over blown plaster fails quickly.
Address underlying moisture problems before re-plastering preventing recurrence. Prevention involves proper preparation, adequate damp-proofing, addressing water ingress promptly.
Small stable cracks repairable without replastering using filler - large, moving, or numerous cracks often need re-plastering addressing underlying causes. Hairline cosmetic cracks fillable with decorators caulk or flexible filler before painting.
Wider cracks need raking out, filling with proper filler, sanding smooth.
Cracks from structural movement, subsidence, or ongoing issues require addressing root causes before repair - filling alone fails as cracks reappear. Extensive cracking, network of cracks, or widespread damage usually indicates re-plastering necessary.
Successful repairs depend on crack cause and extent. Monitor repaired cracks - reappearance indicates underlying problems needing investigation. Professional assessment determines whether repair sufficient or re-plastering necessary.
Proper repair preparation and materials essential for lasting results.
Well-maintained plastered ceilings last 50-100+ years - longevity depends on construction type, materials, maintenance, and environmental conditions. Modern plasterboard ceilings with skim typically last 50-70 years in good conditions.
Traditional lath and plaster ceilings often last 100+ years when properly maintained - many Victorian examples still sound today. Moisture significantly reduces lifespan - bathroom and kitchen ceilings need good ventilation.
Water damage from leaks drastically shortens life requiring repair or replacement. Structural movement, vibration, or settlement causes premature failure.
Regular inspection identifies problems early - sagging, cracking, staining indicate attention needed. Proper maintenance prevents early failure. Quality materials and skilled installation crucial for longevity.
Listed building lime plaster ceilings can last centuries with appropriate care.
Yes, plastered walls need proper preparation and sealing before tiling - primer/sealer, often tanking in wet areas, ensuring tile adhesion and waterproofing. Fresh plaster must dry completely before tiling - minimum 2-4 weeks.
Apply appropriate primer sealing porous plaster preventing excessive tile adhesive absorption ensuring proper bonding. Wet areas like bathrooms require tanking - waterproof membrane systems preventing water penetration behind tiles.
Sand and cement render or moisture-resistant boards better than gypsum plaster in wet areas. Standard gypsum plaster unsuitable for direct tiling in wet rooms without comprehensive tanking.
PVA sometimes used but proper tile primers preferable. Building regulations specify waterproofing requirements for wet areas. Proper preparation prevents tile failure, water damage, expensive remediation.
Professional tilers assess substrate suitability and preparation requirements.
Avoid painting too soon, excessive heat, impact damage, water exposure, drilling prematurely - allowing proper drying and curing essential for plaster integrity. Don't paint before minimum 2-3 weeks - trapped moisture causes problems.
Avoid excessive heating attempting to speed drying - rapid drying causes cracking and poor finish. Don't hang pictures or shelves until plaster adequately cured - impact during curing damages surface.
Avoid water exposure - don't wash walls, prevent splashes, keep moisture away. Don't apply full-strength paint as first coat - mist coat essential sealing porous surface. Avoid blocking ventilation - good airflow aids proper drying.
Don't rush decoration - patience ensures quality results. Avoid temperature extremes during drying. Don't drill or fix items for several weeks allowing complete curing.
Following proper aftercare prevents problems ensuring lasting quality plastered walls.
You connect straight with the plasterer for your area – they’re the one who knows your neighbourhood and will manage your enquiry personally.
You connect straight with the plasterer for your area – they’re the one who knows your neighbourhood and will manage your enquiry personally.
You connect straight with the plasterer for your area – they’re the one who knows your neighbourhood and will manage your enquiry personally.
You connect straight with the plasterer for your area – they’re the one who knows your neighbourhood and will manage your enquiry personally.
You connect straight with the plasterer for your area – they’re the one who knows your neighbourhood and will manage your enquiry personally.
You connect straight with the plasterer for your area – they’re the one who knows your neighbourhood and will manage your enquiry personally.
You connect straight with the plasterer for your area – they’re the one who knows your neighbourhood and will manage your enquiry personally.
You connect straight with the plasterer for your area – they’re the one who knows your neighbourhood and will manage your enquiry personally.
You connect straight with the plasterer for your area – they’re the one who knows your neighbourhood and will manage your enquiry personally.
You connect straight with the plasterer for your area – they’re the one who knows your neighbourhood and will manage your enquiry personally.
Bonding plaster suits high suction backgrounds like brick, concrete, dense blocks.
Browning plaster designed for low suction backgrounds like lightweight blocks. Both are undercoat/base coat plasters applied before skim finish but formulated for different substrate types.
Bonding has gypsum and additives providing strong adhesion to dense surfaces absorbing moisture quickly.
Browning contains different additives working with low suction surfaces preventing plaster drying too quickly on absorbent backgrounds. Using wrong type causes adhesion problems - bonding on lightweight blocks dries too fast causing cracking, browning on brick may not adhere properly.
Professional plasterers select appropriate base coat matching substrate. Both applied at 10-15mm thickness providing leveling and strength before skim coat. Modern alternatives include one-coat plasters working on multiple surfaces.
Correct base coat selection essential for lasting results - substrate assessment determines which needed. Most common mistake using bonding everywhere regardless of background material.
Multi-finish is gypsum-based finishing plaster creating smooth surfaces ready for decoration - most commonly used skim coat in modern plastering. Applied in two thin coats totaling 2-3mm thickness over base coats or directly onto plasterboard.
Works on various backgrounds including bonding, browning, plasterboard, old plaster making it versatile choice.
Quick setting time around 1.5-2 hours requires skilled application - plasterers must work efficiently achieving smooth finish before setting. Provides hard durable surface accepting paint and wallpaper well. White/cream color when dry.
Smooth finish requires multiple trowel passes as plaster firms. Alternative to board finish which designed specifically for plasterboard only. Mixed with clean water to creamy consistency.
Professional plasterers prefer multi-finish for reliability and workability. Sets firm allowing decoration after adequate drying period. Most economical finishing plaster for general use providing quality results with proper application.
Board finish designed specifically for plasterboard providing superior adhesion and reduced cracking on board surfaces compared to multi-finish. Contains additives specifically formulated for plasterboard's low suction characteristics.
Multi-finish works adequately on plasterboard but board finish technically better suited.
Practical difference minimal for most applications - many plasterers use multi-finish on everything including boards with excellent results. Board finish slightly lighter weight and easier to apply on ceilings.
Sets marginally faster than multi-finish. More expensive than multi-finish though difference small. Professional preference varies - some swear by board finish for boards, others use multi-finish throughout.
For critical applications or large plasterboard areas board finish reduces cracking risk. DIY users might find board finish more forgiving on boards. Both produce quality finishes with proper technique.
Choice often comes down to plasterer preference and material availability. Either works well when applied correctly.
Scrim tape is open-weave fabric tape reinforcing plaster joints preventing cracks forming along seams between plasterboards or at corners. Applied over joints before skim coating providing reinforcement where boards meet.
Made from jute or fiberglass mesh allowing plaster penetrating and bonding through weave.
Essential at plasterboard joints, internal corners, ceiling-wall junctions - weak points prone to cracking without reinforcement. Self-adhesive scrim simplifies application though traditional scrim requires bedding in base coat.
Prevents cracks appearing along board edges as building settles or materials expand/contract. Small investment preventing long-term cracking problems. Professional plasterers always tape joints before skimming.
Skipping scrim almost guarantees cracks appearing later along joins. External corners often use metal or plastic beading instead providing both reinforcement and neat edge. Width typically 50-100mm covering joint adequately.
Proper scrim application takes extra time but essential for crack-free results.
PVA (polyvinyl acetate) is bonding agent and sealer controlling surface suction ensuring proper plaster adhesion and workability. Applied diluted with water to surfaces before plastering creating sealed layer preventing excessive moisture absorption.
High suction surfaces suck moisture from plaster too quickly causing poor adhesion and rapid drying.
PVA seals surface allowing plaster maintaining workability, bonding properly, drying at controlled rate. Mixed roughly 3-4 parts water to 1 part PVA though ratios vary by surface and PVA type.
Applied with brush or roller ensuring even coverage. Must use while tacky - letting PVA fully dry creates sealed surface plaster won't bond to. Not suitable for all applications - lime plaster shouldn't use PVA.
Wet areas like bathrooms need proper primer not PVA. Some plasterers avoid PVA preferring other preparation methods. Proper PVA use prevents common adhesion problems but incorrect application causes issues.
Follow manufacturer instructions for mixing ratios and application timing.
Angle beads create straight reinforced external corners protecting edges from damage.
Stop beads provide neat finishing edges where plastering stops. Angle beads (corner beads) metal or plastic profiles fixed to external corners before plastering.
Plaster applied both sides creating crisp straight corner while bead reinforces protecting from knocks.
Stop beads define plaster edges at doorways, windows, different materials preventing ragged edges and providing depth guide. Available in various materials - galvanized steel most durable, plastic cheaper but less impact resistant, stainless steel for wet areas.
Different depths match plaster thickness - typically 10mm or 13mm. Fixed with plaster dabs, nails, or adhesive before plastering. Proper bead installation ensures straight professional corners and edges.
Attempting corners without beads produces rounded inconsistent edges vulnerable to damage. Expansion beads used in long runs controlling cracking from thermal movement.
Quality beads and correct installation distinguish professional from amateur work.
Generally yes but best practice uses same brand throughout avoiding potential compatibility issues and ensuring consistent performance. Different manufacturers use varying formulations, additives, setting times potentially causing problems when mixed.
British Gypsum most common UK brand with reliable consistent products.
Mixing base coat from one manufacturer with skim from another usually works but risks adhesion or setting issues. Budget brands may have inconsistent quality affecting finish.
Professional plasterers often stick to preferred brand knowing performance characteristics. Emergency situations might require mixing brands when supplies limited - usually works but not ideal.
Lime plasters definitely need same system throughout - mixing lime brands risks compatibility problems. Modern gypsum plasters more forgiving but consistency comes from using matched products.
If mixing brands unavoidable ensure base coat fully dried before applying different brand skim. Quality brands like British Gypsum, Knauf, Siniat generally compatible. Very cheap unbranded plasters risky mixing with quality products.
One-coat plasters combine base and finish in single application.
Two-coat systems use separate base coat and skim finish for superior quality. One-coat plaster applied at greater thickness (around 10-15mm) in single application supposedly eliminating base coat stage.
Faster application and theoretically cheaper.
Professional plasterers generally prefer two-coat systems - base coat for strength and leveling, skim coat for smooth finish producing better quality results. One-coat plaster harder to achieve perfectly smooth finish - single thick application difficult to get flat.
Two-coat allows correcting levels with base then perfecting finish with skim. One-coat suits rough finishes, agricultural buildings, less critical applications. Two-coat essential for quality residential and commercial work.
One-coat plaster dries faster potentially causing application difficulties. Traditional approach using separate base and finish coats produces superior results worth extra time. Most professional domestic plastering uses two-coat system.
One-coat plaster has niche applications but not substitute for quality two-coat work.
Essential plastering tools include trowels, hawk, mixing tools, buckets, straight edges, floats, brushes ensuring proper application and finish quality. Plastering trowel (finishing trowel) most important - stainless steel rectangular blade applying and smoothing plaster.
Hawk holds plaster being worked - flat platform with handle underneath. Bucket trowel for mixing and scooping.
Mixing paddle and drill for preparing plaster to correct consistency - hand mixing small amounts possible but drill essential for larger jobs. Straight edge checking flatness and ruling off base coats.
Devil float (sponge float) for texture finishes. Brushes for cleaning and dampening. Gauging trowel for mixing small amounts. Internal corner trowel for neat corner finishing. Spirit level ensuring true surfaces.
Spot board for holding mixed plaster near work area. Professional plasterers invest in quality tools - cheap trowels produce inferior results. Proper tool maintenance keeps edges sharp and surfaces clean.
Experience matters more than expensive tools but quality equipment helps achieving professional finish.
Cement render is sand and cement mixture for external walls providing weather protection.
Gypsum plaster is internal wall and ceiling finish creating smooth decorated surfaces. Render designed withstanding weather - rain, frost, UV, wind - protecting building fabric externally.
Gypsum plaster unsuitable externally - moisture causes deterioration and failure.
Render applied thicker (typically 15-20mm) in multiple coats building up weather-resistant coating.
Gypsum plaster thinner (2-15mm depending on type) creating smooth internal finishes. Render sets through cement hydration - chemical reaction with water. Gypsum plaster sets through crystallization - different process entirely.
Render much harder and more durable than gypsum but rougher finish. Gypsum achieves smoother surfaces suitable for decoration. Each material designed for specific application - using interchangeably causes problems.
Modern renders include additives improving flexibility and water resistance. Gypsum products focus on workability and smooth finish.
Never use gypsum plaster externally or cement render on internal decorated surfaces - materials not interchangeable despite both being ""plaster"".
You connect straight with the plasterer for your area – they’re the one who knows your neighbourhood and will manage your enquiry personally.
You connect straight with the plasterer for your area – they’re the one who knows your neighbourhood and will manage your enquiry personally.
You connect straight with the plasterer for your area – they’re the one who knows your neighbourhood and will manage your enquiry personally.
You connect straight with the plasterer for your area – they’re the one who knows your neighbourhood and will manage your enquiry personally.
You connect straight with the plasterer for your area – they’re the one who knows your neighbourhood and will manage your enquiry personally.
You connect straight with the plasterer for your area – they’re the one who knows your neighbourhood and will manage your enquiry personally.
You connect straight with the plasterer for your area – they’re the one who knows your neighbourhood and will manage your enquiry personally.
You connect straight with the plasterer for your area – they’re the one who knows your neighbourhood and will manage your enquiry personally.
You connect straight with the plasterer for your area – they’re the one who knows your neighbourhood and will manage your enquiry personally.
You connect straight with the plasterer for your area – they’re the one who knows your neighbourhood and will manage your enquiry personally.
Damp patches result from water penetration through walls, rising damp, condensation, or leaks requiring identifying source before repair attempts. Penetrating damp from external wall defects - cracked render, failed pointing, blocked gutters allowing rainwater entering.
Rising damp from failed or absent damp proof course letting ground moisture rising through walls.
Condensation from inadequate ventilation, excessive moisture production, cold surfaces - most common cause especially in bathrooms and kitchens. Plumbing leaks from pipes hidden in walls causing localized damp patches.
Roof leaks allowing water traveling down through structure. Simply replastering over damp creates temporary cosmetic fix - damp returns causing new plaster failure.
Proper diagnosis essential - moisture meter readings, pattern analysis, external inspection identifying root cause.
Different damp types need different solutions - external repairs, damp proof course installation, improved ventilation, leak repairs. Plastering only after eliminating moisture source and allowing thorough drying.
Treating symptom not cause wastes money and time.
Bulging or sagging indicates plaster losing adhesion, water damage, structural movement, or excessive thickness causing failure requiring urgent assessment. Water damage most common cause - leaks saturate plaster making it heavy, weakening substrate bond causing sagging or bulging.
Blown plaster where adhesion failed creates hollow voids - plaster separates from wall bulging outward.
Excessive plaster thickness applied improperly - too thick creates weight substrate cannot support causing sagging especially on ceilings. Structural movement from settlement, subsidence, inadequate support stresses plaster beyond capacity.
Age-related deterioration particularly in lath and plaster ceilings - fixing nails rust, timber rots, plaster loses bond. Sagging ceilings represent safety hazard - collapse risk requiring immediate professional assessment.
Bulging walls indicate serious problems needing urgent investigation. Temporary propping might be necessary preventing collapse while arranging repairs. Never ignore bulging or sagging - indicates imminent failure.
Professional assessment determines whether repair possible or complete replacement necessary.
Small holes filled with ready-mixed filler, larger holes need patching with plaster matching existing surface depth and material. Hairline to pencil-sized holes - ready-mixed filler sufficient.
Clean hole removing loose material, slightly undercut edges helping filler key. Apply filler proud of surface, allow drying, sand flush.
Larger holes require proper plaster repair - clean back to sound plaster, apply PVA if needed, fill with base coat if deep, finish with skim coat matching surrounding plaster. Very large holes might need plasterboard patch cutting square section, inserting board, taping joints, skimming.
Deep holes fill in stages allowing each layer drying - single thick fill cracks and sags. Match plaster type - lime plaster holes need lime repair, gypsum needs gypsum.
Professional finish requires blending repair into surrounding area - feathering edges, matching texture. Small cosmetic holes DIY friendly. Larger structural repairs need professional assessment ensuring proper technique and materials.
Rushed repairs create lumpy visible patches requiring eventual professional correction.
Hollow sound when tapping indicates blown plaster - plaster separated from substrate creating void behind surface requiring removal and replacement. Plaster lost adhesion to wall or ceiling leaving air gap between plaster and substrate.
Tapping solid plaster produces dull solid sound. Hollow sound means plaster no longer bonded properly.
Common causes include moisture damage, poor surface preparation, age-related adhesion failure, structural movement, or using wrong materials. Blown areas unstable - might seem intact but will fail eventually causing falling plaster.
Small blown patches sometimes injectable with specialized adhesives though not always successful. Larger blown areas require complete removal back to sound substrate then proper replastering.
Leaving blown plaster risks sudden failure particularly on ceilings creating safety hazard. Professional assessment determines extent - what seems small area might indicate widespread failure.
Systematic tapping reveals full blown area extent. Address underlying cause before replastering preventing recurrence. Blown plaster not repairable by surface treatment - needs proper removal and replacement.
No, never plaster over mold - must eliminate mold, treat affected areas, resolve moisture source before any plastering preventing health risks and recurring problems. Mold indicates excessive moisture - condensation, leaks, rising damp, penetrating damp needing identification and resolution.
Plastering over mold traps spores creating health hazards and allowing continued growth behind new plaster.
Proper treatment involves removing mold-affected plaster, treating substrate with mold killer, identifying and eliminating moisture source, ensuring thorough drying before replastering. Surface mold on sound plaster might just need treatment and redecoration.
Extensive mold growth usually indicates plaster damage requiring removal. Building regulations require mold remediation before covering.
Health implications serious - respiratory problems, allergic reactions, particular risk to vulnerable people. Simply covering mold creates worse long-term problems than proper treatment.
Professional mold assessment often necessary determining extent and treatment requirements. Adequate ventilation essential preventing future mold growth.
Plastering creates mold-free surface temporarily but problem returns without addressing root moisture cause.
Recurring cracks indicate underlying movement, structural issues, substrate problems, or inadequate repairs requiring addressing root cause not just filling cracks. Structural movement from settlement, subsidence, heave, or inadequate support causes ongoing stress exceeding plaster flexibility.
Temperature and humidity changes cause expansion and contraction - weak points crack repeatedly.
Substrate movement beneath plaster - timber shrinkage, concrete curing, different materials meeting create movement joints that crack. Previous repairs inadequate - filler without addressing cause, wrong materials, insufficient preparation mean cracks reopening.
Plasterboard joints insufficiently reinforced - missing scrim tape causes repeated joint cracking. Building movement normal to degree but excessive or ongoing movement needs structural assessment.
Filling cracks without addressing cause wastes time and money - cracks return. Professional structural survey necessary if movement suspected. Expansion joints might be needed accommodating movement without cracking.
Some cracking inevitable in older buildings - monitoring shows whether worsening or stable. Movement cracks need flexibility solutions not rigid fillers.
Efflorescence is white salt deposits appearing on plaster surface indicating moisture issue requiring addressing water source before surface treatment. Salts from substrate, building materials, or groundwater migrate to surface through moisture evaporation leaving white powdery or crystalline deposits.
Brush off dried efflorescence - comes away easily when dry.
Recurring efflorescence signals ongoing moisture problem - rising damp, penetrating damp, new plaster or render drying out containing soluble salts. New plaster often shows temporary efflorescence as dries - normal not concerning if stops once fully dried.
Persistent efflorescence indicates moisture source needing identification and elimination. Painting over efflorescence causes paint failure - salts push through causing bubbling and flaking.
Efflorescence on old plaster suggests new moisture source requiring investigation. Chemical treatments available neutralizing salts but ineffective without resolving moisture. Proper ventilation helps evaporation reducing salt migration.
Ensure plaster fully dried before decoration preventing salt problems. Efflorescence itself mainly cosmetic but symptom of potential serious moisture issues requiring attention.
Detached plaster requires complete removal back to sound substrate then proper replastering - attempting reattachment creates short-lived unreliable repair. When plaster separated from wall it lost adhesive bond - cannot reliably reattach to substrate.
Small areas sometimes injectable with specialized adhesives through drilled holes attempting re-bonding though success variable.
Large detached areas need complete removal - loose plaster removed back to sound material, substrate prepared properly, new plaster applied using correct techniques and materials. Attempting to stick detached plaster back creates bodge repair failing quickly under stress or temperature changes.
Professional approach removes failed work ensuring proper bond with new plaster. Identify why adhesion failed - moisture, poor preparation, wrong materials, substrate issues - preventing recurrence.
Proper removal prevents bigger problems later when bodge repair fails. Cost-cutting keeping detached plaster creates false economy requiring complete redo eventually. Sound substrate preparation essential for lasting repair.
Accept that proper repair means removal and replacement - no satisfactory shortcuts exist for detached plaster.
Patchy appearance normal on fresh plaster - drying unevenly creates light and dark patches disappearing as plaster fully cures before decoration. Plaster dries from outside in creating varying moisture levels causing patchy coloring - darker areas still damp, lighter areas drying faster.
Completely normal during drying process not indicating defect.
Persistent patches after full drying might indicate underlying issues - inadequate mixing, contaminated materials, substrate problems, or premature decoration attempts. Allow minimum 2-3 weeks full drying before decorating - patience lets patches resolve naturally.
Adequate ventilation and gentle heating promote even drying reducing persistent patchiness. Painting too soon seals moisture causing permanent patchy appearance and paint adhesion problems.
First coat should be mist coat allowing continued moisture evaporation. Full-strength paint on insufficiently dried plaster creates permanent patchy finish.
Different areas dry at different rates due to ventilation, heating, wall thickness variations. Monitor drying progress - moisture meters confirm adequate dryness. Rushing decoration most common cause of permanent patchy problems.
Patience during drying prevents expensive decoration failures.
Failing ceiling represents immediate safety hazard requiring urgent professional assessment and temporary securing preventing collapse while arranging proper repairs. Do not remain beneath sagging or cracked ceiling - serious injury or death risk from collapse.
Clear area below removing furniture and belongings.
Contact emergency plasterer or structural engineer immediately for professional assessment - DIY repairs inappropriate for ceiling failure. Temporary propping might be necessary supporting ceiling preventing complete collapse while arranging repairs.
Photograph damage for insurance claims. Turn off electricity if ceiling damage near light fittings. Identify cause - water damage, structural movement, age, inadequate support determining repair approach.
Insurance might cover emergency securing costs and repairs depending on cause. Partial ceiling collapse often indicates wider area at risk requiring comprehensive assessment not just visible damage repair.
Professional repairs might involve complete ceiling replacement rather than patching. Never ignore ceiling problems - deterioration accelerates rapidly creating extreme danger.
Sagging, cracking, bulging, staining all warning signs needing immediate professional attention before catastrophic failure occurs.
You connect straight with the plasterer for your area – they’re the one who knows your neighbourhood and will manage your enquiry personally.
You connect straight with the plasterer for your area – they’re the one who knows your neighbourhood and will manage your enquiry personally.
You connect straight with the plasterer for your area – they’re the one who knows your neighbourhood and will manage your enquiry personally.
You connect straight with the plasterer for your area – they’re the one who knows your neighbourhood and will manage your enquiry personally.
You connect straight with the plasterer for your area – they’re the one who knows your neighbourhood and will manage your enquiry personally.
You connect straight with the plasterer for your area – they’re the one who knows your neighbourhood and will manage your enquiry personally.
You connect straight with the plasterer for your area – they’re the one who knows your neighbourhood and will manage your enquiry personally.
You connect straight with the plasterer for your area – they’re the one who knows your neighbourhood and will manage your enquiry personally.
You connect straight with the plasterer for your area – they’re the one who knows your neighbourhood and will manage your enquiry personally.
You connect straight with the plasterer for your area – they’re the one who knows your neighbourhood and will manage your enquiry personally.
Most plastering work doesn't require building regulations approval - cosmetic replastering, re-skimming, repairs generally exempt from formal approval requirements. Building regulations apply to structural work, new construction, extensions, conversions affecting building fabric or performance.
Internal replastering existing rooms typically falls outside regulations scope.
Situations requiring approval include fire-rated plasterboard in means of escape, acoustic performance specifications in conversions, thermal requirements in extensions, structural ceiling changes. Listed buildings need separate listed building consent even for internal work.
New plasterboard stud walls creating rooms might need approval depending on use and fire separation requirements. Loft conversions, basement conversions require building control involvement including plastering specifications.
Commercial properties have stricter requirements than domestic. When in doubt consult building control - they advise whether approval needed. Proceeding without required approval creates problems selling property or with insurance claims.
Professional plasterers understand when regulations apply. Most straightforward domestic replastering needs no formal approval process.
Fire regulations mainly concern means of escape, separating walls between properties, fire resistance in certain locations requiring appropriate plasterboard specifications. Standard plasterboard provides 30 minutes fire resistance - adequate for most domestic applications.
Fire-rated plasterboard needed for escape routes, walls separating dwellings, protecting steel beams, garage-to-house walls.
Different ratings available - 30 minute, 60 minute, 90 minute depending on application and building regulations requirements. Party walls between terraced or semi-detached properties need fire-resistant construction.
Loft conversions require fire-rated ceiling below protecting escape route. Plasterboard type affects fire performance - pink or red boards indicate fire rating. Two layers sometimes specified achieving higher resistance ratings.
Building control specifies requirements for regulated work. HMO (houses in multiple occupation) have stricter fire separation requirements. Commercial buildings follow different more stringent standards.
Fire stopping at junctions critical - gaps around edges compromise fire resistance. Skim plaster over fire-rated board maintains rating. Professional plasterers understand fire requirements ensuring compliance.
Sound insulation requirements apply to conversions creating new dwellings, certain extensions, HMOs requiring acoustic plasterboard or additional sound-proofing measures. Loft conversions creating habitable rooms need sound insulation between new rooms and existing dwelling.
Basement conversions similar requirements. Party walls between properties already have inherent sound requirements through building construction.
Acoustic plasterboard contains higher density core reducing sound transmission - used where building regulations specify acoustic performance. New build properties must meet sound insulation standards between dwellings.
Converting single dwelling into flats triggers acoustic requirements. Standard plasterboard provides minimal sound insulation - acoustic versions significantly better.
Sound testing might be required proving compliance with Part E Building Regulations. Adding resilient bars, acoustic mineral wool, multiple plasterboard layers improves acoustic performance.
HMO conversions have strict sound insulation requirements between rooms. Building control specifies requirements during approval process. Retrofitting sound insulation to existing properties optional unless converting use.
Professional acoustic specifications needed for regulated work ensuring compliance.
Listed building consent typically required for internal plastering work using conservation-grade materials, approved techniques, often supervised by conservation officer. Listed building protection covers internal and external fabric - even internal replastering needs consent.
Lime plaster usually mandatory maintaining building breathability and historical authenticity. Modern gypsum generally prohibited damaging historic fabric.
Conservation officer specifies acceptable materials, methods, finishes ensuring heritage value preservation and appropriate restoration. Grade I, II*, and II listings have different control levels but all require consent for alterations.
Unauthorized work on listed buildings illegal - enforcement action possible requiring reversal at owner's expense plus potential fines. Detailed specifications and method statements often required before consent granted.
Specialist conservation plasterers understand listed building requirements. Some minor repairs might fall under permitted works but always check first. Listed building consent separate from planning permission and building regulations.
Heritage organizations like Historic England provide guidance. Listed building ownership brings responsibilities including appropriate maintenance and repair using suitable materials and methods.
UK has no mandatory licensing or registration for plasterers - anyone can legally offer plastering services regardless of qualifications or experience. Unlike gas engineers or electricians, plastering unregulated profession with no legal requirement for certification.
This means customers must verify competency through qualifications, insurance, references, portfolio rather than relying on mandatory registration.
Professional bodies exist like Federation of Plastering and Drywall Contractors but membership voluntary not mandatory. Absence of regulation increases importance of due diligence - checking insurance, qualifications, references essential.
Some voluntary schemes exist - TrustMark, Checkatrade, local authority approved trader schemes providing some vetting but not regulatory oversight.
Quality highly variable without mandatory standards - ranges from highly skilled professionals to completely unqualified cowboys. Insurance provides protection but doesn't guarantee competency.
Consider this when choosing plasterer - qualifications and track record matter more than regulatory compliance which doesn't exist. Industry calls for regulation but currently unrestricted trade.
Buyer beware applies - proper vetting essential.
Health and Safety at Work Act applies - plasterers must work safely, manage risks, protect themselves and others from hazards during work. Risk assessment required identifying hazards - working at height, dust exposure, manual handling, slips and trips, chemical exposure.
Adequate dust control protecting workers and occupants - respiratory protection, ventilation, dust suppression.
Working at height requires appropriate equipment - scaffolding, towers, platforms meeting safety standards with edge protection and stability. Manual handling assessment for heavy materials preventing injury.
COSHH regulations cover hazardous substances - plaster dust, PVA, cleaning chemicals requiring proper handling and protection. Asbestos awareness essential - artex and old plaster might contain asbestos needing appropriate handling.
Electrical safety around wet plaster and power tools. First aid provision and emergency procedures. Employers have greater responsibilities including training, supervision, equipment provision.
Self-employed plasterers responsible for their own safety and not endangering others. HSE enforces regulations with improvement notices or prosecutions for serious breaches.
Professional plasterers understand safety requirements maintaining safe working practices.
Waste disposal regulations require proper handling and legal disposal of plastering waste - fly-tipping illegal with significant fines possible. Plaster waste, old plaster removed, packaging, contaminated materials all require appropriate disposal.
Gypsum-based plaster waste classified differently from general waste requiring separate disposal at licensed facilities.
Duty of care requires waste transferred only to licensed carriers with proper documentation proving legal disposal chain. Mixing gypsum waste with biodegradable waste in landfill creates hydrogen sulfide gas - environmental hazard meaning separate gypsum disposal mandatory.
Waste carriers need registration - check before hiring skip or waste removal. Householders responsible ensuring contractors dispose waste legally - your property, your responsibility if they fly-tip.
Keep waste transfer notes proving legal disposal. Environment Agency enforces waste regulations. Commercial waste has stricter requirements than domestic. Recycling gypsum plaster possible at appropriate facilities reducing landfill.
Professional plasterers arrange proper legal waste disposal through licensed carriers. Fly-tipping prosecutions can result in unlimited fines and criminal records.
Wet rooms require comprehensive waterproofing meeting building regulations - tanking systems, falls to drainage, appropriate materials preventing water damage and structural issues. Building regulations Part C covers moisture resistance requiring waterproof construction preventing water penetration.
Tanking essential - waterproof membrane systems on walls and floors before tiling.
Floor must have adequate fall (minimum 1:80) toward drainage ensuring water doesn't pool. Cement-based render or waterproof boards replace standard gypsum plaster unsuitable for wet areas.
Tanking extends minimum 200mm beyond shower area, full height in shower zone. Joints, corners, penetrations need careful detailing preventing water ingress. British Standard BS 8212 provides guidance on wet room construction.
Testing often required proving waterproofing integrity before tiling. Adequate ventilation mandatory preventing condensation and mold. Electrical installations require special zones and protection.
Building control approval usually needed for wet room installations. Professional wet room specialists understand complex requirements ensuring compliant waterproof installation.
Poor wet room construction causes expensive water damage to property below.
No, planning permission not required for internal plastering - planning controls external appearance and building use, not internal decoration and finishes. Internal replastering, re-skimming, repairs all considered permitted development requiring no planning application.
Planning permission concerns external changes, extensions, use changes, development affecting neighbors or surroundings.
Exception is listed buildings where listed building consent needed for internal work even though planning permission isn't - separate consent regime protecting heritage. Conservation areas have additional controls but mainly affecting external appearance not internal plastering.
Change of use might require planning - converting house to HMO, commercial use, multiple dwellings triggers planning requirements but plastering itself doesn't.
Creating new rooms through internal subdivision sometimes needs building regulations but not planning permission. Confusion often exists between planning permission and building regulations - completely separate systems.
Planning permission rarely relevant to plastering work. Listed building consent different regime applying to listed structures. Most domestic plastering entirely outside planning control scope.
No legal requirement for warranties but reputable plasterers typically offer 12-month guarantee covering workmanship defects - material failures, adhesion problems, cracking from poor application. Guarantee should be written specifying coverage, duration, exclusions, remedy process.
Typical guarantee covers defects arising from poor workmanship not damage from customer actions or building movement.
Insurance-backed guarantees provide protection if plasterer ceases trading - without this guarantee worthless if business fails. Consumer Rights Act 2015 provides statutory protection - services must be performed with reasonable care and skill regardless of written guarantee.
Guarantees don't cover normal wear, impact damage, alterations by others, or issues arising from customer-caused problems. Some plasterers offer longer guarantees on specific products or systems. Get guarantee in writing before work starts.
Verbal promises unenforceable. Photograph work completion date-stamping evidence. Guarantee claim process should be clear - who to contact, timeframe for response, remedy options.
Absence of written guarantee red flag suggesting less professional operation. Quality plasterers stand behind their work offering reasonable guarantee protection.
You connect straight with the plasterer for your area – they’re the one who knows your neighbourhood and will manage your enquiry personally.
You connect straight with the plasterer for your area – they’re the one who knows your neighbourhood and will manage your enquiry personally.
You connect straight with the plasterer for your area – they’re the one who knows your neighbourhood and will manage your enquiry personally.
You connect straight with the plasterer for your area – they’re the one who knows your neighbourhood and will manage your enquiry personally.
You connect straight with the plasterer for your area – they’re the one who knows your neighbourhood and will manage your enquiry personally.
You connect straight with the plasterer for your area – they’re the one who knows your neighbourhood and will manage your enquiry personally.
You connect straight with the plasterer for your area – they’re the one who knows your neighbourhood and will manage your enquiry personally.
You connect straight with the plasterer for your area – they’re the one who knows your neighbourhood and will manage your enquiry personally.
You connect straight with the plasterer for your area – they’re the one who knows your neighbourhood and will manage your enquiry personally.
You connect straight with the plasterer for your area – they’re the one who knows your neighbourhood and will manage your enquiry personally.